1. Remove the engine from vehicle. 
2. Remove the V-belts.
3. Remove the V-belt tensioner.
4. Remove the crank pulley.
5. Remove the scavenger pump.
6. Remove the vacuum pump.
7. Remove the camshaft position sensor.
8. Remove the oil level gauge and oil level gauge guide from the chain cover.
9. Remove the chain cover.
10. Remove the timing chain assembly.
11. Remove the cam sprocket.
NOTE:
Step 11 is only performed when replacing the camshaft.
12. Remove the intake manifold.
13. Remove the generator.
14. Remove the A/C compressor.
15. Remove the rocker cover.
16. Disconnect the fuel delivery pipe and return pipe.
17. Remove the camshaft.
18. Remove the cylinder head.
19. Remove the fuel pump gear.
20. Remove the fuel pump.
21. Remove the common rail assembly.
22. Remove the oil pan.
23. Remove the oil pan upper and strainer.
24. Remove the oil pump.
25. Remove the engine oil cooler.
26. Remove the water pump.

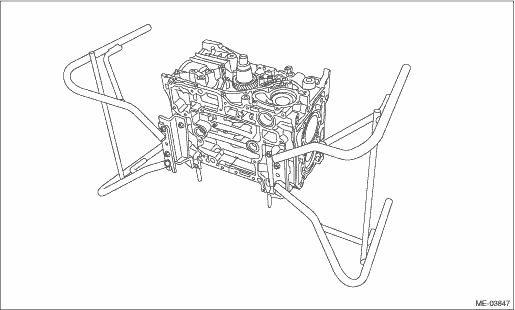
27. Face the front of the engine up, standing the engine on one end.
28. Mark the direction of front and the cylinder number on all connecting rod caps.
29. Remove the #1 and #4 connecting rod caps and pistons from the cylinder block.
NOTE:
• Use 3/8 inch (9.5sq.) for the extension and TORX® socket (E12).
• After removing the two connecting rod bolts, turning the crankshaft counterclockwise will remove the connecting rod cap.
• Mark each connecting rod cap and piston with a cylinder number.
• The removal of all connecting rod caps and pistons are performed in two separate steps. First, the #1 and #4 connecting rod caps and pistons are worked on simultaneously, then the #2 and #3 connecting rod caps and pistons are worked on simultaneously.
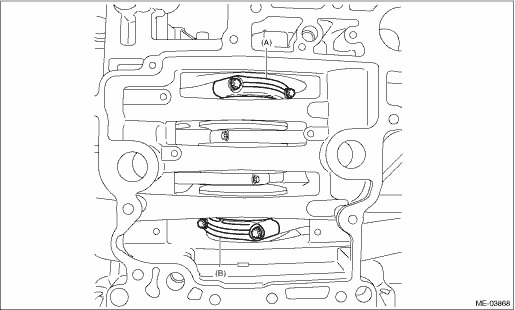
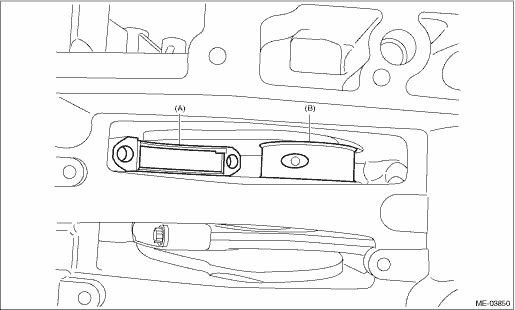
(1) Using the ST, turn the crankshaft and set the #1 piston at the mid point between TDC and BDC.
| ST 18252AA000 | CRANKSHAFT SOCKET |
|
(A) |
#1 connecting rod cap |
(B) |
#4 connecting rod cap |
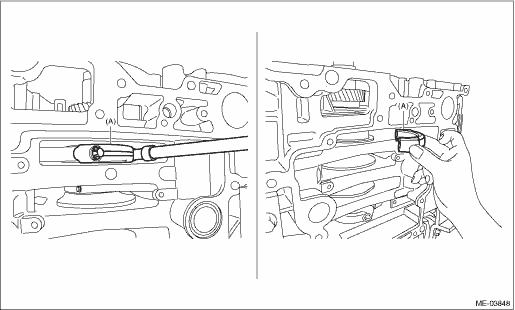
(2) Remove the two #1 connecting rod cap connection bolts, and remove the connecting rod cap.
|
(A) |
#1 connecting rod cap |
(3) Remove the two #4 connecting rod cap connection bolts, and remove the connecting rod cap.
|
(A) |
#4 connecting rod cap |
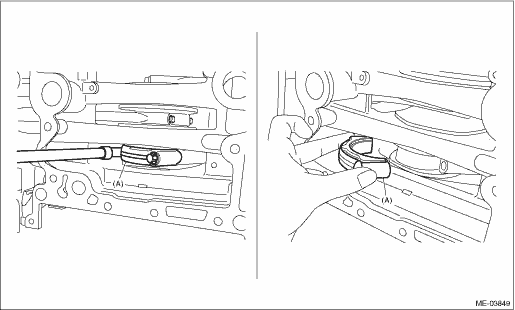
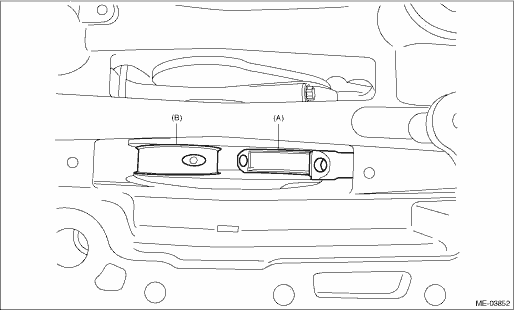
(4) Using the ST, turn the crankshaft and separate the positions of the crank pin and the large end of the #1 connecting rod.
| ST 18252AA000 | CRANKSHAFT SOCKET |
|
(A) |
#1 connecting rod |
(B) |
Crank pin |
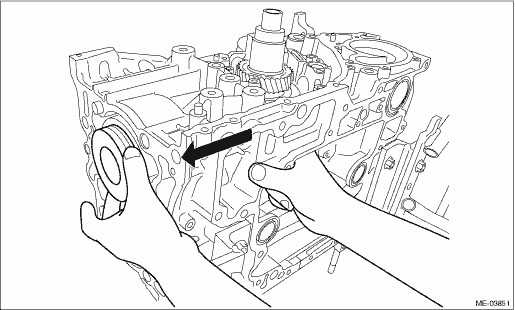
(5) Push the #1 connecting rod in the direction of the arrow, and remove the #1 piston and connecting rod from the cylinder block.
(6) Using the ST, turn the crankshaft and separate the positions of the crank pin and the large end of the #4 connecting rod.
| ST 18252AA000 | CRANKSHAFT SOCKET |
|
(A) |
#4 connecting rod |
(B) |
Crank pin |
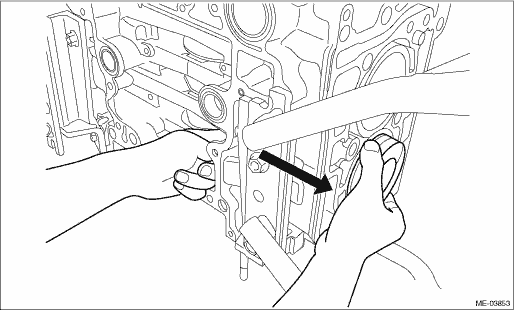
(7) Push the #4 connecting rod in the direction of the arrow, and remove the #4 piston and connecting rod from the cylinder block.
30. Remove the #2 and #3 connecting rods and pistons from the cylinder block in the same manner.
| ST 18252AA000 | CRANKSHAFT SOCKET |
31. Face the cylinder block (RH) up.
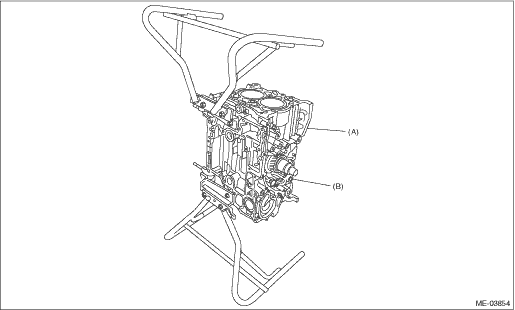
|
(A) |
Cylinder block (RH) |
(B) |
Cylinder block (LH) |
32. Separate the cylinder block.
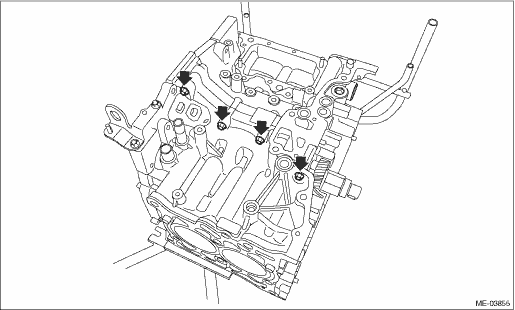
(1) Remove the upper bolt.
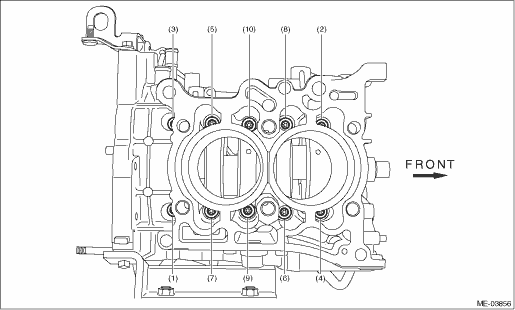
(2) Loosen the cylinder block bolts in the order indicated in the figure, and separate cylinder block (RH) and (LH).
NOTE:
Confirm that the crankshaft is remaining in the cylinder block (LH).
If the cylinder block (RH) is lifted carelessly when separating, the crankshaft may stick to cylinder block (RH), then fall off.
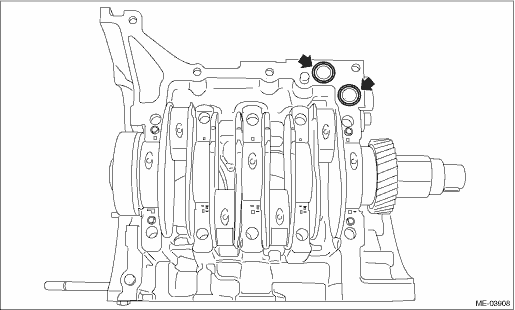
33. Remove the rear oil seal.
34. Remove the O-ring from the cylinder block (LH).
35. Remove the crankshaft from cylinder block (LH).
36. Remove the crankshaft bearings from the cylinder block.
NOTE:
• Do not confuse the combination of crankshaft bearings.
• Press the bearing at the end opposite to locking lip.