NOTE:
• Be careful that the foreign objects do not become attached to assembled component during installation.
• Apply engine oil to all component parts of the timing chain.
1. Prepare to attach the chain tensioner.
(1) Insert the screw, spring pin and plunger into the tensioner body.
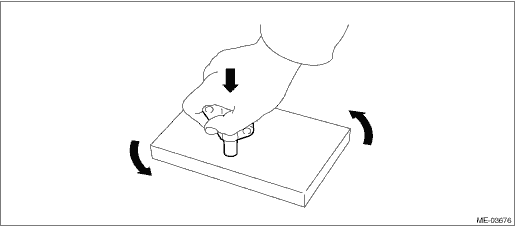
(2) As shown in the figure, turn the rubber mat counterclockwise while holding the chain tensioner from above by hand.
NOTE:
Degrease the contact surface between the plunger head and rubber mat, so that they do not slip.
(3) Insert the stopper pin into the hole on the chain tensioner body.
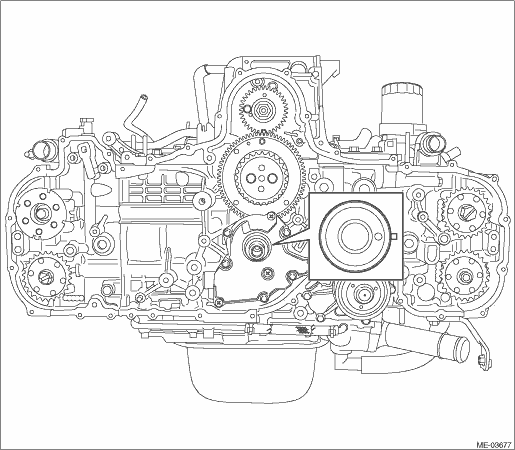
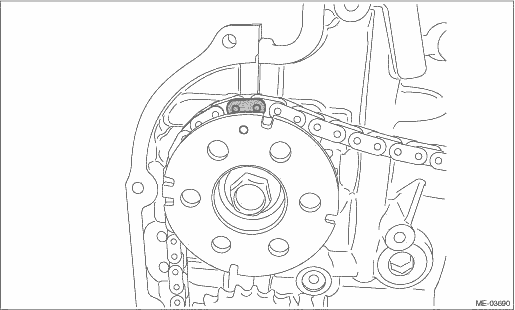
2. Position the #1 piston at TDC.
(1) Using ST, align the position of the crank gear key at the 3 o’clock position as shown in the figure.
| ST 18252AA000 | CRANKSHAFT SOCKET |
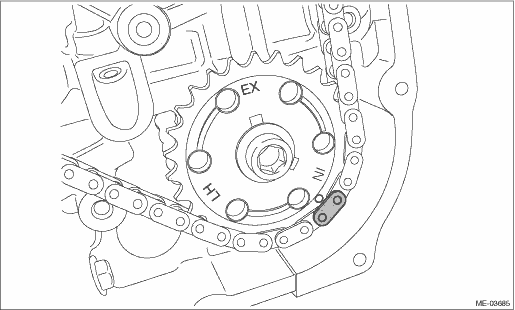
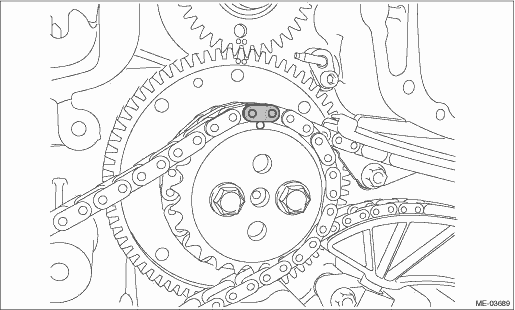
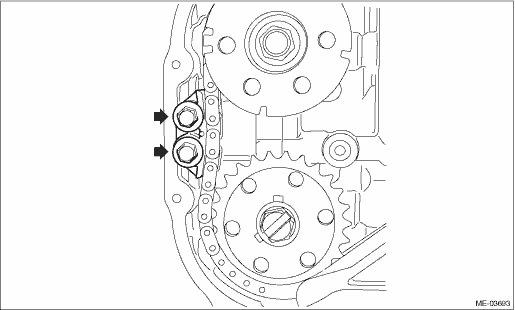
(2) In step (1), make sure that the timing mark of the reduction sprocket and gear is at the 12 o’clock position indicated in the figure.
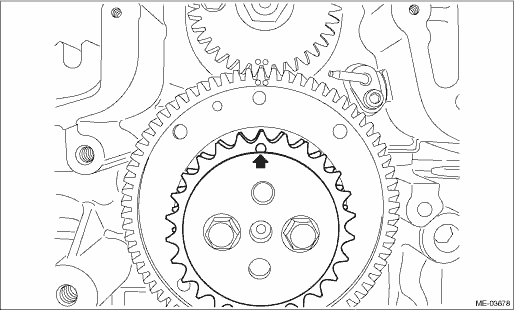
(3) Make sure that the reduction sprocket and gear timing mark is at the 12 o’clock position indicated in the figure, and that the fuel pump gear timing mark is at the 6 o’clock position, and that they both overlap each other.
(4) Check again that the crank gear key position, reduction sprocket and gear sprocket side timing mark, reduction sprocket and gear gear side timing mark, and fuel pump gear timing marks are all at the specified positions.
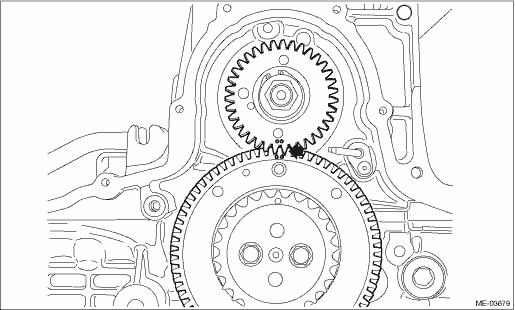
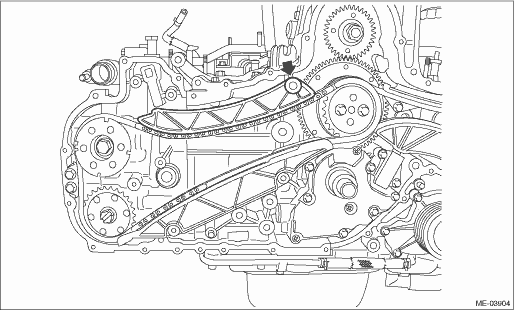
3. Align the intake cam sprocket (LH) and exhaust cam sprocket (LH) at the position indicated in the figure.
NOTE:
Until the timing chain attachment work is all completed, do not rotate the cam sprocket.
| ST 18355AA000 | PULLEY WRENCH |
| ST 18334AA030 | PULLEY WRENCH PIN SET |
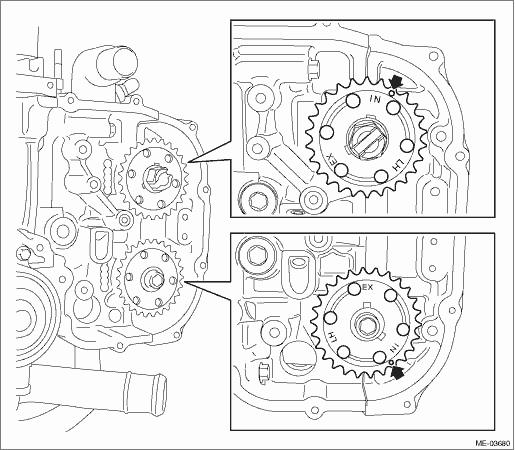
4. Align the intake cam sprocket (RH) and exhaust cam sprocket (RH) at the position indicated in the figure.
NOTE:
Until the timing chain attachment work is all completed, do not rotate the cam sprocket.
| ST 18355AA000 | PULLEY WRENCH |
| ST 18334AA030 | PULLEY WRENCH PIN SET |

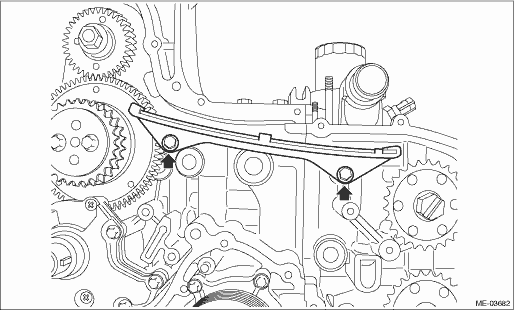
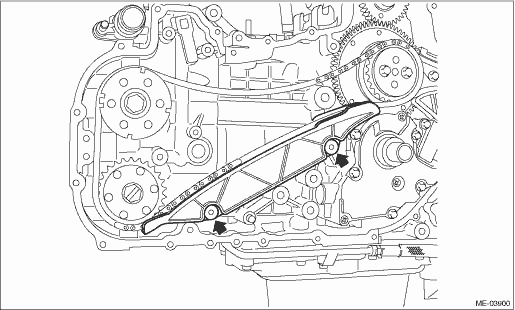
5. Install the chain guide (LH).
Tightening torque:
16 N·m (1.6 kgf-m, 11.8 ft-lb)
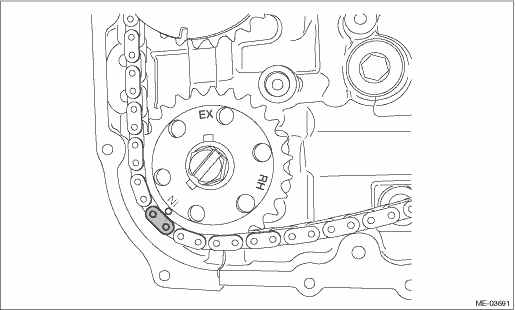
6. Install the timing chain (LH).
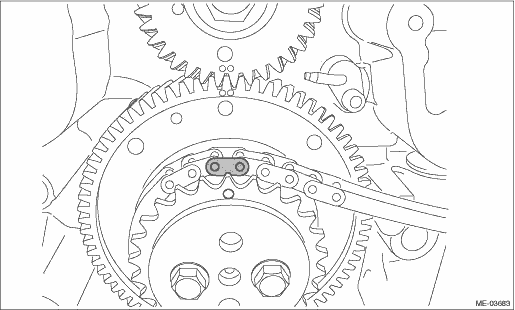
(1) Match the timing chain (blue) to the timing mark position of the reduction sprocket and gear.
(2) Match the timing chain (gold) to the timing mark position of the intake cam sprocket (LH).
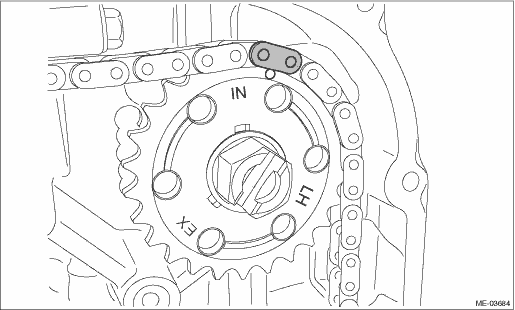
(3) Match the timing chain (gold) to the timing mark position of the exhaust cam sprocket (LH).
7. Install the chain guide (LH: between cams).
Tightening torque:
6.4 N·m (0.7 kgf-m, 4.7 ft-lb)
8. Install the chain guide (sprocket).
Tightening torque:
6.4 N·m (0.7 kgf-m, 4.7 ft-lb)
9. Install the chain tensioner lever (LH).
Tightening torque:
16 N·m (1.6 kgf-m, 11.8 ft-lb)
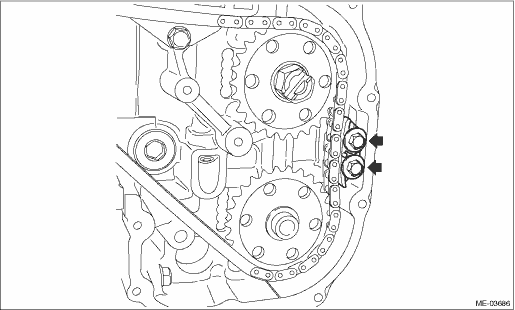
10. Install the chain tensioner (LH).
NOTE:
Make sure that there is no bolt attached on the side face of the chain tensioner (LH) housing.
Tightening torque:
16 N·m (1.6 kgf-m, 11.8 ft-lb)

11. Pull out the stopper pin from the chain tensioner (LH).
NOTE:
The timing chain (LH) line will be complete.
12. Attach timing chain (RH).
(1) Match the timing chain (blue) to the timing mark position of the reduction sprocket and gear.
(2) Match the timing chain (gold) to the timing mark position of the intake cam sprocket (RH).
(3) Match the timing chain (gold) to the timing mark position of the exhaust cam sprocket (RH).
13. Install the chain guide (RH).
Tightening torque:
6.4 N·m (0.7 kgf-m, 4.7 ft-lb)
14. Install the chain guide (RH: between cams).
Tightening torque:
6.4 N·m (0.7 kgf-m, 4.7 ft-lb)
15. Install the chain tensioner lever (RH).
Tightening torque:
16 N·m (1.6 kgf-m, 11.8 ft-lb)
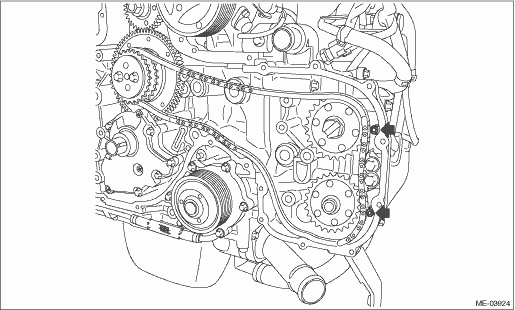
16. Install the chain tensioner (RH).
NOTE:
Make sure that there is a bolt (M3) attached on the side face of the chain tensioner (RH) housing.
Tightening torque:
16 N·m (1.6 kgf-m, 11.8 ft-lb)
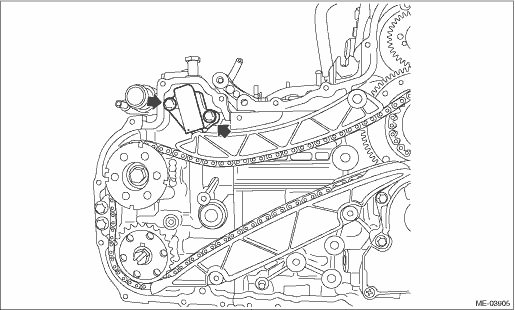
17. Pull out the stopper pin from the chain tensioner (RH).
NOTE:
The timing chain (RH) line will be complete.
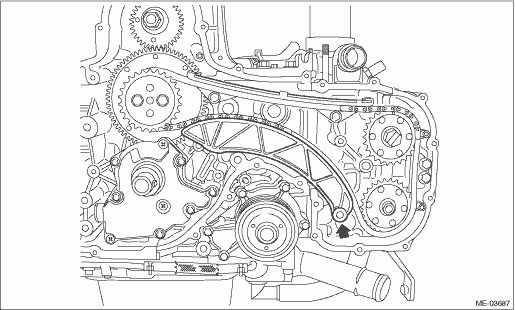
18. After installation, perform the following confirmations.
CAUTION:
Always make sure to perform this confirmation.
(1) Make sure that the reduction sprocket and gear timing mark matches the mark (blue) of the timing chain (LH).
(2) Make sure that the reduction sprocket and gear timing mark matches the mark (blue) of the timing chain (RH).
(3) Make sure that the LH side intake cam sprocket and exhaust cam sprocket timing marks, and the mark (gold) of the timing chain (LH) matches.
(4) Make sure that the RH side intake cam sprocket and exhaust cam sprocket timing marks, and the mark (gold) of the timing chain (RH) matches.
(5) Make sure that all bolts are tightened at the specified torque.
19. Using the ST, turn the crankshaft in the direction of engine rotation for 2 turns or more, and make sure that there are no abnormal conditions.
CAUTION:
Always make sure to perform this confirmation.
| ST 18252AA000 | CRANKSHAFT SOCKET |
20. Install the chain cover. 
21. Attach the oil level gauge and oil level gauge guide to the chain cover.
22. Install the camshaft position sensor.
23. Install the vacuum pump.
24. Install the scavenger pump.
25. Install the crank pulley.
26. Install the V-belt tensioner.
27. Install the V-belts.
28. Install the radiator.
29. Install the radiator main fan motor assembly.
30. Install the radiator sub fan motor assembly.
31. Install the air intake duct and hose.
32. Install the air intake boot.
33. Install the under cover.
34. Lower the vehicle.
35. Fill the engine oil.
36. Fill engine coolant.
37. Connect the ground cable to battery.