CAUTION:
When removing the rocker cover, insert cushion rubber or the equivalent between the engine and the vehicle to avoid them contacting each other, and be careful not to damage any parts.
1. Set the vehicle on a lift.
2. Remove the collector cover.
3. Remove the battery. 
4. Remove the air intake duct (rear).
5. Remove the air cleaner case and the air cleaner element.
6. Remove the air intake boot and the air intake bracket.
7. Remove the air intake duct and hose.
8. Remove the intercooler.
9. Remove the radiator sub fan and fan motor.
10. Remove the radiator main fan and fan motor.
11. Remove the radiator upper brackets.
12. Disconnect the connector and terminal B from the generator, and remove the generator harness and collector cover bracket.
13. Remove the V-belts.
14. Disconnect the A/C compressor connector, and move the A/C compressor aside the engine.
CAUTION:
Do not disconnect high and low pressure pipes from the A/C compressor.
15. Remove the fuel filter assembly, fuel filter protector and fuel filter lower bracket. (RHD model only)
16. Remove electric power steering control module. (RHD model only)
17. Remove electric power steering control module bracket. (RHD model only)
18. Disconnect the brake booster vacuum hose.
19. Remove the starter terminal B.
20. Remove the starter harness bracket.
21. Disconnect the engine harness connectors, then remove the engine harness connector from the bracket.
22. Disconnect the fuel delivery hose and fuel return hose from the clamp.
23. Remove the pitching stopper.
24. Remove the engine oil filter. (LHD model only)
25. Lift up the vehicle.
26. Remove the under cover.
27. Drain the engine oil.
28. Remove the catalytic converter and DPF and the exhaust pipe (front).
29. Disconnect the stabilizer link, and separate the front arm and housing.
30. Drain the transmission gear oil.
31. Separate the front drive shaft from the transmission.
32. Remove four bolts securing the transmission cushion rubber to the transmission, and temporarily tighten two long bolts with same size at diagonal positions.
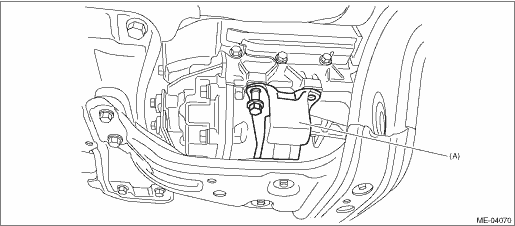
|
(A) |
Transmission cushion rubber |
33. Remove the engine mounting connecting nuts and washers from the crossmember.
34. Lower the vehicle.
35. Disconnect the fuel injector connectors of all cylinders and affix the harnesses and connectors on intake manifold side.
CAUTION:
To prevent damage to the fuel injector connectors and harnesses, make sure to perform this step.
36. Separate engine and crossmember.
(1) Support the engine with a lifting device and wire ropes.
(2) Hold it in place with the lifter slightly raised, so that the front cushion rubber stud bolt is drawn out of the crossmember.
(3) Attach ST1, ST2 and ST3 between front cushion rubber and crossmember.
NOTE:
• The illustration shows the removal of rocker cover (LH).
• Engage ST1 with ST2 in advance.
• Set the ST so that it touches the front cushion rubber locator.
| ST1 11032AA000 | CYLINDER BLOCK PLATE |
| ST2 11032AA010 | CYLINDER BLOCK PLATE |
| ST3 11032AA020 | CYLINDER BLOCK PLATE |
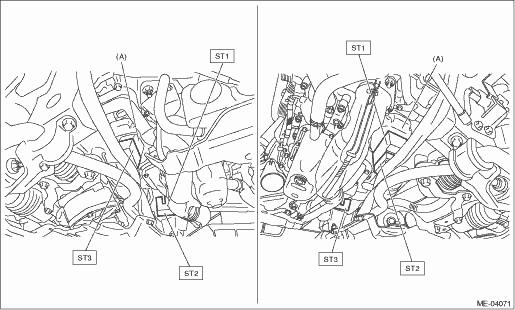
|
(A) |
Front cushion rubber |
(4) Lower the lift until the ST touches the crossmember completely.
(5) Bounce the engine to check if the ST is disconnected or slides from the correct position on the crossmember.
37. Remove the air breather hose from the rocker cover (LH).
38. Remove the turbo pipe from rocker cover (RH).
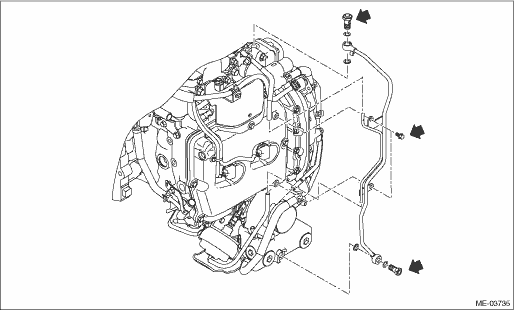
39. Remove the intake manifold protector.
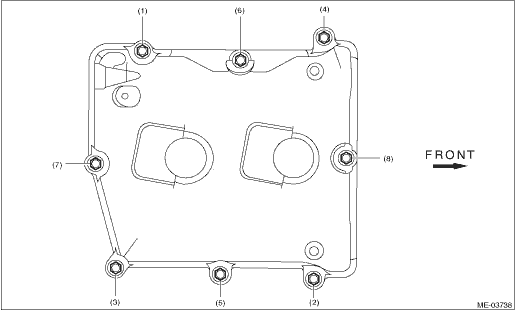
40. Loosen the rocker cover bolts in the order indicated in the figure, and remove the rocker cover.
• LH side
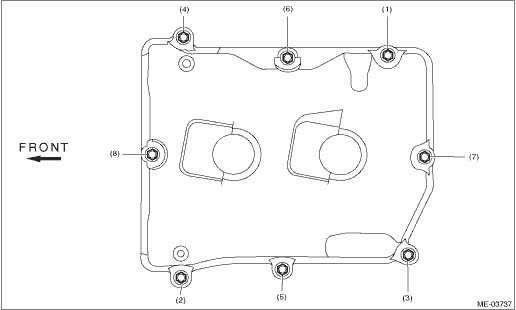
• RH side
41. Remove the rocker cover gasket and fuel injector gaskets, and remove the liquid gasket.