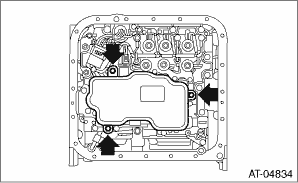
1. Check the control valve body for dust and other foreign matter.
2. Attach a new control valve strainer to the control valve body.
(1) Apply ATF to the periphery of the O-ring on the control valve strainer.
CAUTION:
When applying ATF, avoid adhesion of dust and foreign matter on the O-ring.
(2) Attach the control valve strainer to the control valve body from the O-ring side.
CAUTION:
If the control valve strainer is inserted diagonally, this may damage the O-ring. Make sure to insert the control valve strainer so that it does not become angled when installing.
(3) Tighten the three bolts.
Tightening torque:
10 N·m (1.0 kgf-m, 7.4 ft-lb)
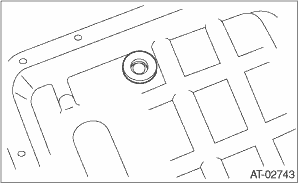
3. Attach the magnet at the specified position of the oil pan.
4. Apply proper amount of liquid gasket to the entire oil pan mating surface.
Liquid gasket:
THREE BOND 1217B (Part No. K0877YA020) or equivalent
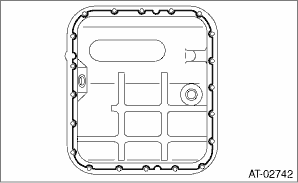
5. Fill the 3 holes aside from the bolt holes in the transmission case, with liquid gasket.
Liquid gasket:
THREE BOND 1217B (Part No. K0877YA020) or equivalent
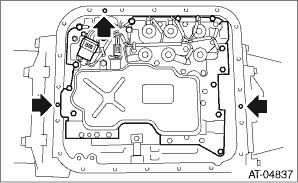
6. Install the oil pan by equally tightening the bolts.
Tightening torque:
5 N·m (0.5 kgf-m, 3.7 ft-lb)
7. Fill ATF from the oil charger pipe.
Recommended fluid:

Capacity:
Fill with the same amount of ATF as drained.
8. Bleed the air of control valve.
9. Check the ATF level.