CAUTION:
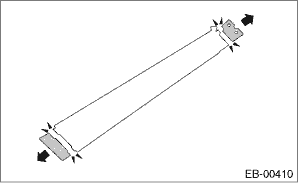
• Press evenly along the sash when applying the tape using a spatula or similar object to make sure no bubbles are formed.
If any bubbles are formed, replace the tape.
• If any wrinkles form in the tape while applying, replace the tape with new tape.
• Be sure to press the ends of the tape firmly to adhere securely. If the tape comes off at the ends or where folded, the adhesive strength is weakened and the tape may peel off.
• There are locations at the ends of the tape where it will overlap. Be sure to check the application order when applying the tape.
• Front
• Rear
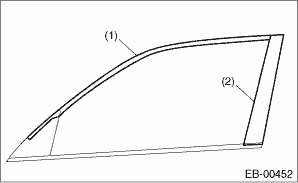
1. Align the cutout of the tape with the top of the gusset as shown in the figure. (Position indicated by the arrow)
|
(1) |
Front door sash tape - front |
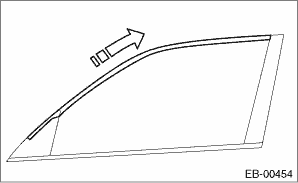
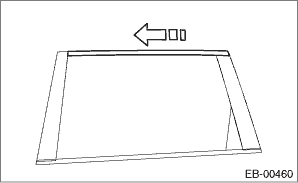
2. Apply the tape from the front of the vehicle towards the rear.
NOTE:
Apply the tape so that the end of the tape is within 2.5±1.5 mm (0.1±0.06 in) from a line extending from the front door rear sash.
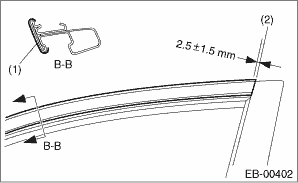
|
(1) |
Front door sash tape - front |
|
(2) |
Line extending from the front door rear sash |
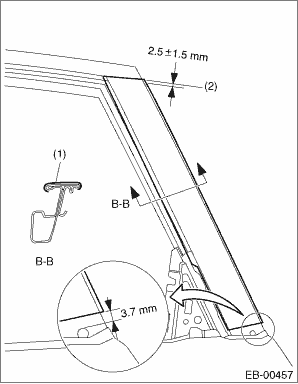
3. Cut away both ends of the front door sash tape-rear.
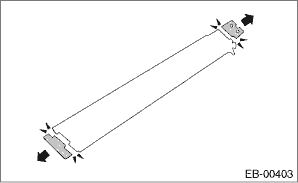
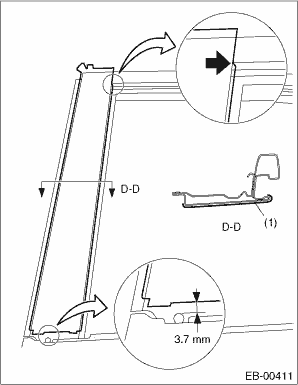
4. Align the cutaway portion of the tape with the corner of the sash as shown in the figure. (Position indicated by the arrow)
5. Position the tape so that there is a clearance of 3.7 mm (0.15 in) at the bottom end of the tape and it is not blocking the outer weather strip installation hole. (Position indicated by the arrow)
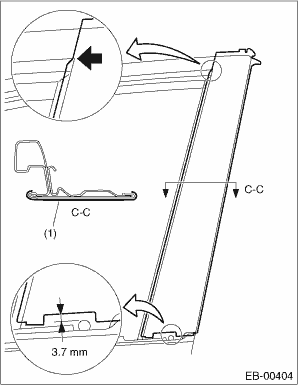
|
(1) |
Front door sash tape - rear |
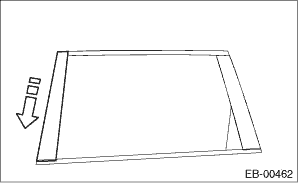
6. Apply the tape from the top of the vehicle towards the bottom.
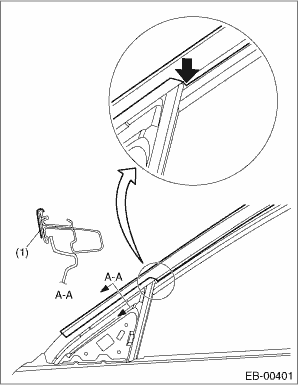
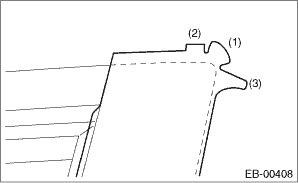
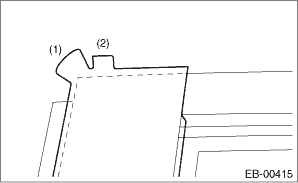
7. Fold the door upper end in order from (1) to (3).
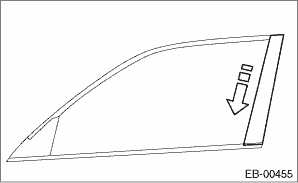
8. Install the door parts in the reverse order of removal.
9. Install while paying attention to maintaining a uniform clearance around the front door panel. For the dimension of clearance, refer to “SPECIFICATION” in “General Description”. 
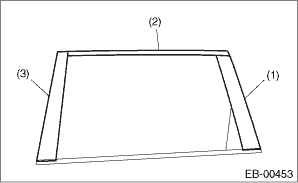
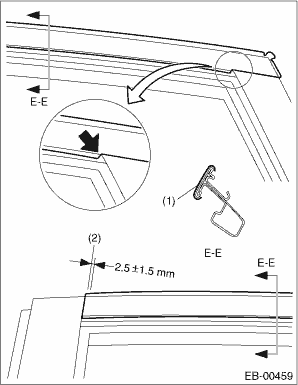
1. Cut away both ends of the rear door sash tape-rear.

2. Apply the tape so that the end of the tape is within 2.5±1.5 mm (0.1±0.06 in) of a line extending from the rear door front sash.
|
(1) |
Rear door sash tape-rear |
|
(2) |
Line extending from the rear door upper sash |
3. Apply the tape from the top of the vehicle towards the bottom.
4. Align the cutout of the tape with the corner of the rear door upper sash as shown in the figure. (Position indicated by the arrow)
NOTE:
Apply the tape so that the end of the tape is within 2.5±1.5 mm (0.1±0.06 in) of a line extending from the rear door front sash.
|
(1) |
Rear door sash tape-medium |
|
(2) |
Line extending from the front sash of the rear door |
5. Apply the tape from the rear of the vehicle towards the front.
6. Fold the door upper end in order from (1) to (3).

7. Cut away both ends of the rear door sash tape-front.
8. Align the cutaway portion of the tape with the corner of the sash as shown in the figure. (Position indicated by the arrow)
9. Position the tape so that there is a clearance of 3.7 mm (0.15 in) at the bottom end of the tape and it is not blocking the outer weather strip installation hole. (Position indicated by the arrow)
|
(1) |
Rear door sash tape-front |
10. Apply the tape from the top of the vehicle towards the bottom.
11. Fold the door upper end in order from (1) to (2).
12. Install the door parts in the reverse order of removal.
13. Install while paying attention to make a uniform clearance around the rear door panel. For the dimension of clearance, refer to “SPECIFICATION” in “General Description”.