This information will improve the efficiency of maintenance and assure the sound work.
Replace the nonreusable parts with new parts. Check the tightening torque and tighten to the specified torque.
Do not apply paint, lubricant, rust retardant or other substance to the surface around bolts, nuts, etc. Doing so will make it difficult to obtain the correct torque and result in looseness and other problem.
Do not touch the control modules, connectors, logic boards and other such parts when there is a risk of static electricity. Always use a static electricity prevention cord or touch grounded metal for the elimination of static electricity before conducting work.
When removing the battery cables, always be sure to turn the ignition switch to OFF to prevent electrical damage to the control module from overcurrent.
Use genuine parts for maximum performance and maintenance when conducting repairs. Subaru/FHI will not be responsible for poor performance resulting from the use of parts except for genuine parts.
5. PROTECTING VEHICLE UNDER MAINTENANCE
Make sure to attach the fender cover, seat covers, etc. before work.
6. ENSURING SECURITY DURING WORK
When working in a group of two or more, perform the work with calling each other to ensure mutual safety.
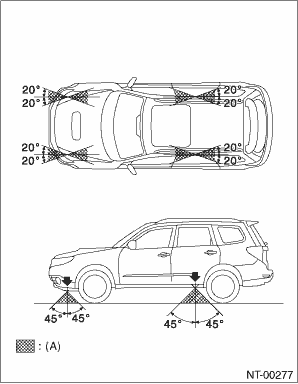
When using a lift or shop jack to raise a vehicle or using rigid rack to support a vehicle, always follow instructions concerning jack-up points and weight limits to prevent the vehicle from falling, which could result in injury. Be especially careful that the vehicle is balanced before raising it. Be sure to set the wheel stoppers when jacking-up only the front or rear side of the vehicle.
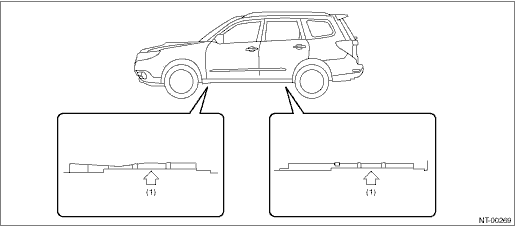
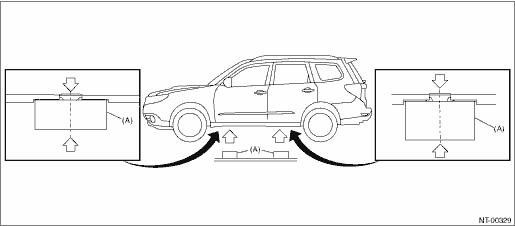
• SUPPORT LOCATIONS
|
(1) |
Jack-up point |
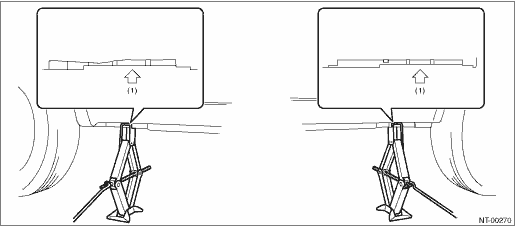
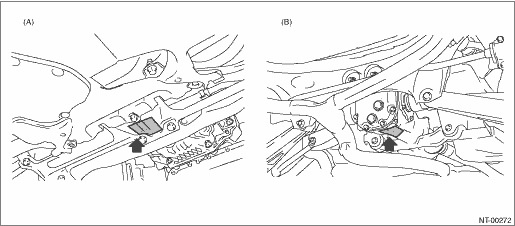
• PANTOGRAPH JACK
|
(1) |
Jack-up point |
• LIFT
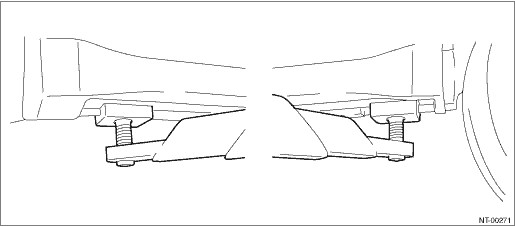
CAUTION:
For the vehicles with side under skirt, using the spacer or attachment to lift up certainly at jack up point without side under skirt and lift contact.
• RIGID RACK

• PLATE LIFT
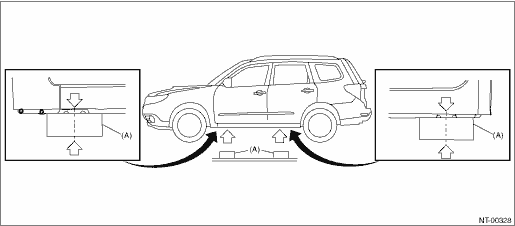
• Model without side sill spoiler
For model without side sill spoiler, align the center of attachment and the center of vehicle cutout.
|
(A) |
Attachment |
• Model with side sill spoiler
For model with side sill spoiler, align the center of attachment and the center of vehicle cutout (center of spoiler cutout).
|
(A) |
Attachment |
• JACK-UP POINT
|
(A) |
Front |
(B) |
Rear |
CAUTION:
If jacking up the front side of the vehicle, make sure that the jack is attached at the center of the jack-up plate not at the sides.
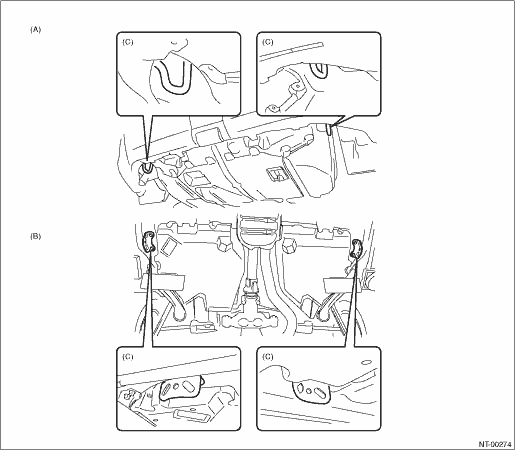
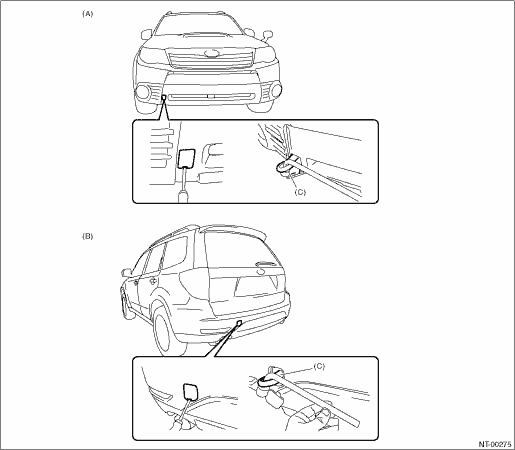
Tie-downs are used when transporting vehicles and when using the chassis dynamo. Attach tie-down only to the specified locations on the vehicle.
|
(A) |
Front |
(B) |
Rear |
(C) |
Hook for tie-down |
• CHAIN DIRECTION AT TIE-DOWN CONDITION
CAUTION:
Chain pulling directions except the followings (recommended) are inappropriate.
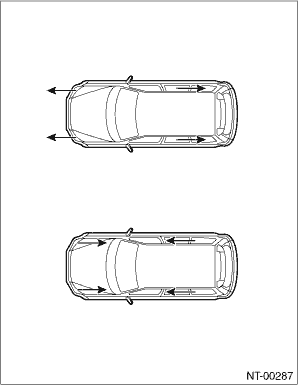
• CHAIN PULLING RANGE AT TIE-DOWN CONDITION
|
(A) |
Chain pulling range at tie-down condition |
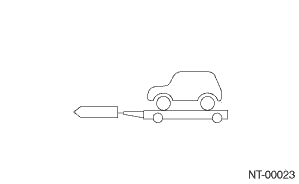
Avoid towing vehicles except when the vehicle cannot be driven. When towing other vehicles, pay attention to the following to prevent hook or vehicle damage resulting from excessive weight.
• Do not tow other vehicles with a front tie-down hook.
• Make sure the vehicle towing is heavier than the vehicle being towed.
• VEHICLE SINKING VOLUME AT TIE-DOWN CONDITION
Measure the distance between the highest tire point and highest arch point before and after tie-down. Difference of measured values (sinking volume) should be within 50 mm (1.97 in) and make sure to fix the vehicle securely.
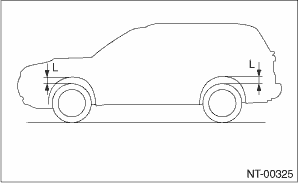
|
(A) |
Front |
(B) |
Rear |
(C) |
Towing hook (Eye bolt) |
• Precautions
|
Towing |
Precautions |
MT |
AT |
|
Lifting up four wheels (On a trailer)
|
Towing the vehicle after lifting up all four wheels is a basic rule for AWD model. |
|
|
|
Rope
|
• Check if both front and rear wheels are rotated normally. • Driving condition for AT model: Driving speed 30 km/h (19 MPH) or less Allow driving distance 50 km (31 miles) or less |
|
|
|
Raising the front wheels
|
Prohibited for full-time AWD model. |
|
|
|
Lifting up the front wheels
|
• Prohibited, due to damage on bumper, front grille, etc. • Do not raise the vehicle with bumper. |
|
|
Marked  : OK, Marked
  : Prohibited, Marked
  : Conditionally OK.
1. At the check and general maintenance, set the damper stay at the normal position.
CAUTION:
• At the check and general maintenance, do not detach the damper stay.
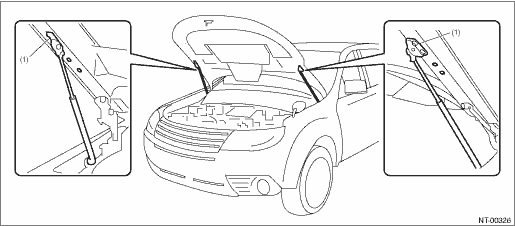
|
(1) |
Normal position |
2. When wider hood opening is necessary, set the hood side of damper stay at lower position shown in the figure.
Tightening torque:

CAUTION:
• Do not leave one side of damper stay removed.
• Always perform works such as inspections and maintenance with both damper stays attached.
• The hood cannot be closed with the hood damper on the full open side. When it is necessary to close, tie the hood striker and the radiator panel with a string etc. to fix them.
• After work, set the damper stay back to the normal position and tighten the bolt to specified torque.
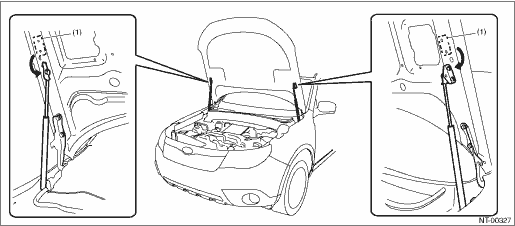
|
(1) |
Normal position |
For an information about training, contact a dealer or agent.
Using general scan tools will greatly improve the efficiency of repairing engine electronic controls. Subaru Select Monitor can be used to diagnose the engine, VDC and other electronically controlled parts.